Sunday, June 25, 2017

DIY Fringe Jeans


Check out how to make this super cute fringe out of any old pair of jeans!! I wore them yesterday and got SOOOO many compliments!!!


What you need:

  • scissors
  • old jeans, works best with straight leg
  • ruler
  • chalk
  • dryer
  • tweezers

Total Cost: None! everything can be found within your home...hopefully!


How to do it:

  • Get your jeans ready! try them on and see how high up you want the fringe to go and mark with the chalk & do on both sides so it is even


  • Cut the seem off of the end of the jean. Also cut the seems on the sides of the legs up to the chalked point so it will be easier to fringe


  • Only a few more cuts!.. . so next you should cut about 1 inch slits up to chalked point (doesn't matter exactly how thick the slits are but I found about 1 inch is easiest) do this around the entire bottom of the pant

  • This part gets annoying.... take each slit and pull out the crossing threads with tweezers, sometimes youll get lucky and big chunks will come out


  • Pull apart the pieces of fringe so that there are no cross threads left, don't have to remove every single cross thread

  • After you do this to EVERY strip of jean, throw the jeans in the dryer for 10 min and it should look like my pictures. Repeat if the fringe still had too many cross threads and didn't break apart

You are all done! Style your unique pants with a cute pair of shoes and a simple top!


Rock your new pants!!

XOXO Lil


Thursday, June 22, 2017

How I Avoided the Freshman 15

Hello Loves,


The freshman 15 is one of the scariest parts about moving onto your first year of college. I hope to help guide you away from that travesty with my freshman routine....


By the way, IN NO WAY am I a health coach or anything, I am a Chemical Engineer. This is how I PERSONALLY avoided the freshman 15.. ..I have no intentions of demanding anyone to follow what I did,  this is just for anyones reference.


So, you are off to college, no more parents to cook for you or make you eat healthy. Now,the dining hall/any on campus food will be your biggest enemy for the coming months. No one is there to portion control you or to tell you not to go for the all you can eat pizza and fried food. You are an adult now so its time to start acting and eating  like one! Most of your new friends will just eat and eat and eat without ant regard to the weight they are about to gain in the coming year.

During my first week of school I realized how doomed I was. You can just swipe your meal card and eat whatever food you want and however much you want. I knew that I couldn't do that especially after being spoiled with home cooked meals my entire life. I personally do not like most of the food my campus serves.. tastes just like the garbage in high school that they tried to pass off as lunch.. GROSS!! I tried to eat selectively at first but eventually I just lowered my standards and ate whatever was in front of me. Needless to say, I forced myself to stop eating the dining hall food altogether after the first month of school. Instead, I took a nice little trip to the grocery store to buy HEALTHY and CHEAP food every few weeks..

This is how I PERSONALLY (aka you do what works for you) survived...

1. Avoid dining hall at all costs!!

  • I repeat DO NOT GO TO THE DINING HALL!! especially if you have no self control like me.. I thought I did, but I absolutely do not.. There is also like a subway and chipotle type place and grille on campus but nonono do no go there until you learn how to avoid the junk... But do what works for you
2. Go to the grocery store
  • Hitch a ride,walk or take the bus if you don't have your own car. You need to plan out what is super cheap but also healthy that will fill you up for your meals these are some of the things that were always on my grocery list
    • bananas
    • peanut butter
    • pretzels
    • tuna packets(sounds gross but 10/10 recommend for salads)
    • lettuce
    • peppers
    • more fruit
    • healthy microwave meals
    • orange juice
    • literally anything is better than the food at school
  • I also  created a pinterest board of simple food you can make on a budget and with minimal kitchen resources, there are a lot more than you would think.. get creative
3. My meal method
  • Ate fruit and yogurt for breakfast, Drank smoothies for lunch(if your campus has a smoothie place).. get that little extra protein booster added and you will be good til dinner time. Be cautious when eating dinner, I would get subway SOMETIMES and get every veggie they had... or just eat a salad.....or pizza YOLO.. whatever you eat just do it in moderation.  And never forget your proteins like meat, fish or eggs... even nuts and such. but hey if you want pizza or wings, eat it!

4. Resist all junk food snacking temptations
  • if you never buy junk food, you will never have the chance to eat it!!
  • ...At least that was my method. I usually get really hungry right before I go to bed cause I am tired and really don't care about my health at that point but gotta resist it!! Instead of junky food, I would eat an apple or banana to hold me over til morning.. gotta keep that belly full! if you are hungry, EAT nutritious snacks.
5. Go to the gym
  • even if its just walking on the treadmill for 20 minutes, you being that much more healthy than you would've been laying in bed watching TV.
6.Change your meal plan
  • meal plans are super expensive, especially when you don't use them. Your school will probably require you to have a certain level of meal plan the first semester but after that, switch to the lowest one possible. I saved about $2000 just switching from my original meal plan to the one I have now and I still didn't use all of it by the end of the second semester.
  • Instead of wasting that money eating garbage food, I bought good food from the grocery store that didn't make me gain the freshman 15!
7. Watch what you drink
  • Don't drink pop.. soda.. whatever you want to call the carbonated beverages under any circumstance... they make your teeth yellow, make you gain weight, give you cavities.. bad idea all around
  • AND FOR THE LOVE OF GOD DO NOT DRINK BEER or anything alcoholic for that matter since you're probably not 21....but  you will probably go to parties and you will be amongst a bunch of drunk half naked people that are completely belligerent. Don't be those people. Handle yourself with grace if you do decide to be a party animal. I personally am the friend group "mom" so I usually volunteer to take care of the crazy ones...so I actually remember the absurd stuff people do.. just be the mom of your group... its better that way....trust me, I have had my moments.

I hope that my personal experience will help you as you move onto your first year of school... I began my first year weighing over 150 pounds and now I way about 130... I defeated the freshman 15.. more like freshman -20 for me.. just remember to not over eat or under eat, find your happy medium!  ALWAYS eat if you're hungry, just be cautious to falling victim of the fried and greasy foods that colleges love to serve...it is a trap!! STAY HEALTHY, DO NOT STARVE YOURSELF OR FEEL GUILTY BY WHAT YOU EAT!!

Best of Luck in College!
xoxo Lil

Thursday, June 15, 2017

Michaels Craft Store Grab Bag

My ABSOLUTE favorite craft store is Michaels... probably because I always end up being that 100th person to walk in the store on customer appreciation day and win a $20 gift card...2 years in a row..I am  only slightly bias...


But anyway, Michaels sometimes has these things called grab bags, which is basically a big box filled with a bunch of random stuff for only $4!!!! They are HARD HARD HARD to find though.
Today, I found my first!


Whatever is inside the box is a complete surprise.. NO PEAKING!!


I am just super excited that I found this.. could be a hit or miss but whatever ItS OnLy FoUr DoLLaRs!!!


Here is  what was in my box


Looks like a bunch of holiday stuff.. $4 holiday stuff ;)


The retail value of the items in the box is over $150 !!!!! A bunch of decorations.. woooh

Ill probably end up giving this stuff to my mom.. just because gold isn't my color.. but she will be so excited that I got her a "random present" LOL ya mom that's right

Overall I think the value of this box is amazing and if you ever see one... SNATCH IT!! Being surprised is the absolute best part!!!!

Michaels is yet again making me love them more and more every time I walk in that store!!!


XOXO
Lil


DIY Nautical Picture Frame

Ever see things in store that are super expensive but you know you could make it yourself? That's  what I thought when I saw this picture frame cost $80 at Nordstrom......I decided to make this one myself..


So this was super easy to make and only cost $4!!!!!

All you need is
  • Nautical Rope (Michaels Craft Store $3/10yds)
  • Picture Frame (Dollar Tree $1)
  • Hot Glue Gun
  • Scissors

Lets Begin!!


  1. Gather your materials
  2. Start gluing rope from inner corner.. its easier to cover the ends of the rope if you go in to out
  3. keep looping around
  4. keep looped... until you reach the edge
  5. As you get towards the corners, try to flatten the rope into the shape of the edge as you glue
  6. Once the frame is covered... You are done!


YES it is that easy!!!


Happy Crafting!!
xoxoxo Lil


As always, Comment any questions!
Don't forget to follow my Instagram @luxurious_life_of_lil


Tuesday, June 13, 2017

Stickers Stickers Stickers!!

DIY ANTHING with STICKERS!!!! Boring laptop? bland water bottle? bare car?


YOU NEED STICKERS!!!


Just look how cute


My laptop is also covered!


Most "preppy" brands will send you free stickers.. all you have to do is email the company or fill out a request on their website!


Here are a few websites:

JadelynnBrook

Hattan Home

Southern Marsh

or buy some on Redbubble

Vineyard Vines also gives free stickers online with a purchase or just stop in-store and ask


or just email your favorite brand's customer service and nicely ask if they are willing to send you free stickers for your car, agenda,laptop, ect.


xoxo   Lil


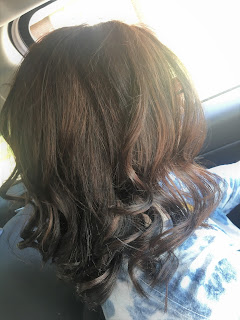
Black to Brown Hair Transformation / Hair Care

I have been box dying my hair black for years.. at the time it was simple and cheap. . . what a mistake that was.


This color took over a month and four appointments to achieve from black
lots of lightening treatments results in lots of processed hair.. gotta start taking better care of it!!


Thank god one of my best friends(@_cut.color.chelsea_) is a hair stylist and was willing to fix my hair for me! She also gave me a few pro tips...
  • Never box dye your hair
  • Don't use ANY drug store hair products.... they ruin your hair with sulfates and other chemicals! Just spend the extra money for a better product& healthy hair
  • Get your dead ends cut every few weeks
  • Brand name drugstore hair products are more expensive than if you were to buy them in the salon
  • DONT FORGET TO USE HEAT PROTECTANT no matter what tool you use! Including your blow dryer!


I threw away ALL of my drugstore hair products.. and I mean everything... I completely restocked my supply with proper healthy hair brands from the salon


Keep your friends close and your stylist friends closer!


Don't forget to follow me(@luxurious_life_of_lil) and my personal sylist(@_cut.color.chelsea_) on Instagram. . . . feel free to comment or message one of us on Instagram if you have any questions!!


If you want to know more about drugstore hair products, watch one of these videos!


Hope this helps!

         xoxo Lily


P.S. here is a pic of my new hair in better lighting!


Sunday, June 11, 2017

DIY Monogrammed Lilly Pulitzer License Plate


Personalize your car with this DIY license plate!! Lilly Pulitzer AND Monogrammed


What you will need:

  • Outdoor/water proof Modge Podge
  • Sponge brush
  • Blank license plate
  • Scissors
  • Printed pattern & monogram


How to do it:
  1. Apply coat of modge podge with the sponge brush on license plate
     2. Stick the printed pattern onto license plate before the coat dried, be sure to cut out the holes where the screws go into your car


     3. Apply another layer on top of the paper and then cut the paper to fit the plate

     4.  Add on the monogram by following the same process. Keep layering the modge podge as it dries

     5. Apply at least 5 layers of modge podge onto the new plate. . . need to create a water tight seal

     6. OPTIONAL: for more durable plate, apply 2 coats of polyurethane to the finished product 

     7. Attach your personalized lilly monogramed license plate to your car!!
   
     8. Any Questions? Comment or Email me!! 


  Enjoy cruising with your new stylish license plate!!
  xoxo Lily


Friday, June 9, 2017

Birkenstock Obsession

Ive been super skeptical about getting myself a pair of Birkenstocks. . . . .  then I found the perfect pair for me.


Pair with a cute Kate Spade belt!


I still think the original cork bottom style is not right for me but, these new rubber shoes are PERFECT! I wore them around all day.. walking around the city on a hot day and they were sooo comfy. 


These are available at Nordstrom or on the Birkenstock website... Hurry while they still have them!  Did I mention that they are only $35?? BEST DEAL EVER.. perfect for summer


Tassel Earrings

Ready for summer???  Tassel jewelry is super popular!  Here's where you shop the best....


BAUBLEBAR !!!!!

These super cute tassel earrings are only $36!  Plus you can shop their tassel earrings in EVERY color!


Wanna make your own? Subscribe to the blog for the DIY coming soon!!

Monday, June 5, 2017

Customized Monogram Wallpapers

I have been searching for a Monogramming app for the last few weeks that lets me create exactly what I want. Finally my search has ended!!


Unlike ALL other monogramming apps/programs, this one allows you to COMPLETELY customize your wallpaper. You can choose from one of the many pre-made backgrounds or upload your own photo(I chose a Lilly Pultizer pattern). YOU pick the font, shape, size and color of the monogram! Check out the ones below....


I am one step closer to being styled for summer with this preppy & colorful new background! Get yours now on the app store.. search Monogram Me . I'm sure you will be just as obsessed as I am! Oh and did I mention that it is FREE!!


  Happy Monogramming,

                     xoxo Lil  


Be sure to follow my Instagram account @luxurious_life_of_lil

DIY Chanel Top

We all have dreams of wearing high fashion designer clothes, but ...... not all of us want to spend hundreds of dollars on it. Check out this DIY Chanel top!!!


So this was super easy to make..

Here is what you will need

  • a piece of clothing
  • X-acto knife
  • printer transfer sheets
  • a printer
  • ironing board
  • iron


Directions...

  1. find a blank picture of the Chanel logo, copy it onto Microsoft word and flip the image vertically so that it looks backwards
  2. follow the directions for the transfer sheet printing and print your logo onto the page
  3. use the X-acto knife to trace around all of the letters to get rid of the clear film, if you do not remove the clear film, there will be a lot of ugly residue on your shirt
  4. To prepare your shirt, make sure to iron over the spot you will be putting the logo onto(to get rid of wrinkles)
  5. place the transfer paper onto the piece of clothing and then make sure it is centered with the ink side down( the logo should look normal through the paper if you did it correctly)
  6. make sure your iron is on with the steam settings OFF!!!
  7. take your iron and press it directly onto the logo and hold for a few seconds and then move it to another spot on the logo, repeat this until the logo has had about 45 seconds of heat in each spot
  8. Wait for the paper to completely cool off and then gently peel it back
  9. If the ink isn't cleanly peeling off of the paper, Iron for about 20 more seconds in each spot
  10. Once the paper comes of clearly..... you are done!!!

*****BE SURE NOT TO IRON THE CLOTHING TO MUCH OR YOU WILL BURN A HOLE THROUGH IT******

TOTAL COST:

Bodysuit.............................................................$8
Transfer Paper......$10x40%coupon/10sheets= $0.60
Other items were previously owned

TOTAL: $8.60


Hope you enjoy this DIY Chanel top that was super cheap & cost less than $9 to make!!! Pair it with a neutral tote bag to complete the chic look. . . .I paired mine with an army green Longchamp!! College budget still intact after this high designer DIY!!


                                          Happy Crafting,

                                                               Lil


P.S. feel free to comment any DIYs you would like to see or how you styled your new outfit!!